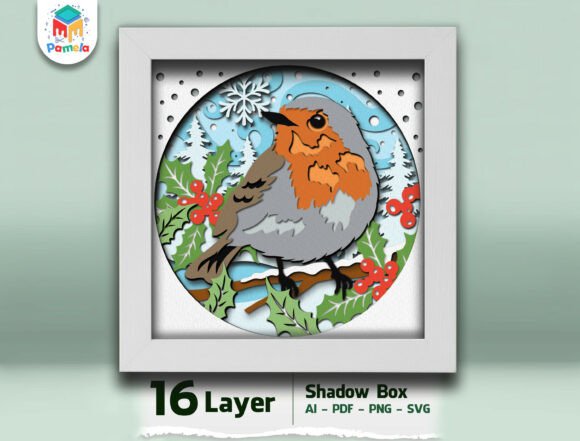
Robin Bird Christmas 3D Shadow Box
The holiday season often brings a desire for decor that feels both timeless and personal. While store-bought ornaments have their place, there is a distinct satisfaction in creating something that captures the quiet magic of winter through layered depth and light. The Robin Bird Christmas 3D Shadow Box offers a sophisticated approach to festive crafting, blending traditional symbolism with modern papercraft techniques. This design is not merely a decoration; it is an exercise in spatial storytelling, where sixteen distinct layers work in harmony to create a scene that changes as the viewer moves or as the lighting shifts.
For creators, designers, and hobbyists, this project represents a perfect intersection of technical precision and artistic expression. Whether you are using a Cricut, Silhouette, or a laser cutter, the process of assembling this shadow box allows you to engage with materials in a tactile way that digital design alone cannot replicate. The result is a piece of home decor that feels curated, intentional, and deeply atmospheric.
The Art of Layered Depth
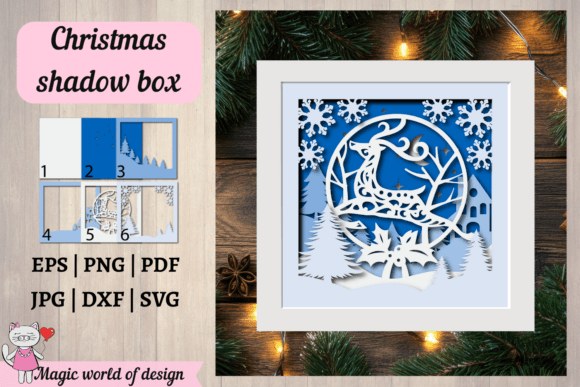
What makes a 3D shadow box compelling is its ability to simulate distance on a two-dimensional plane. With sixteen layers, the Robin Bird Christmas 3D Shadow Box utilizes parallax scrolling principles commonly seen in animation, but static and tangible. Each layer acts as a frame within a frame, guiding the eye toward the focal point: the robin, a classic symbol of hope and renewal during the winter months.
The complexity of sixteen layers might seem daunting at first, but it is precisely this density that creates the rich, velvety shadows essential to the aesthetic. When assembled correctly with appropriate spacers, the gaps between layers allow light to travel through the structure, creating soft gradients rather than harsh lines. This depth transforms simple cardstock into a dynamic visual experience. For those new to multi-layer projects, this design serves as an excellent medium-difficulty challenge that teaches patience and precision without requiring advanced engineering skills.
Material Selection for Professional Results
The success of any papercraft project relies heavily on material choice. For this specific design, using cardstock between 160–250 gsm is recommended. Lighter paper may buckle under the weight of the layers or fail to hold crisp cut lines, while heavier board might be difficult to cut cleanly on standard desktop machines. The weight of the paper also affects how light interacts with the edges; thicker stock creates more defined shadows, enhancing the three-dimensional effect.
Beyond the paper, the spacing mechanism is critical. Foam tape or 3D adhesive pads are ideal for maintaining consistent gaps between layers. Consistency is key here; uneven spacing can distort the perspective and make the final image look cluttered rather than cohesive. If you plan to illuminate the piece, consider using an LED light strip placed behind the backmost layer or along the sides of the frame. Warm white LEDs tend to complement the cozy, nostalgic feel of a Christmas robin, while cool white can create a crisp, wintry morning atmosphere.
Versatility in Design and Application
One of the strongest advantages of purchasing a digital file package—including SVG, PDF, PNG, and AI formats—is the flexibility it offers. You are not locked into a single interpretation of the design. Here are several ways different users can adapt the Robin Bird Christmas 3D Shadow Box for various contexts:
- Home Decor Enthusiasts: Use the standard 8x8 inch or 20x20 cm size for mantelpieces, entryway tables, or bedroom nightstands. The compact square format fits easily into existing gallery walls or standalone deep-set frames.
- Small Business Owners: With a license for up to 100 end products, artisans can create limited-edition holiday gifts. Customize the color palette to match specific interior design trends, such as muted earth tones for Scandinavian styles or bold reds and greens for traditional aesthetics.
- Educators and Workshop Leaders: This project is an excellent tool for teaching spatial reasoning and fine motor skills. Break the assembly process into steps, allowing students to focus on one section at a time. It also provides a practical lesson in how light and shadow influence perception.
- Graphic Designers: The included AI and SVG files allow for modification before cutting. You might add personalized text, change the background scenery, or integrate other elements like snowflakes or holly berries to create a bespoke version for clients.
Customization and Creative Variations
While the default design is beautiful, making it your own adds significant value. Consider experimenting with monochromatic schemes. An all-white or cream-colored shadow box creates a subtle, elegant look that relies entirely on texture and shadow rather than color contrast. This approach works particularly well in minimalist interiors where bold colors might feel out of place.
Alternatively, try a gradient effect by using progressively darker shades of paper from the front layer to the back. This technique enhances the illusion of depth, making the background appear further away. For a more whimsical touch, incorporate translucent vellum or acetate sheets for specific layers, such as falling snow or mist, which can diffuse light beautifully when illuminated.
If you are using a laser cutter, you can experiment with different materials beyond paper. Thin wood veneer or acrylic can provide a completely different tactile quality, though you will need to adjust the vector settings accordingly. The SVG format ensures compatibility with most cutting software, making these material swaps straightforward for experienced makers.
Practical Assembly Tips
To ensure a clean and professional finish, organization is paramount. Before you begin cutting, label each layer clearly. With sixteen pieces, it is easy to lose track of the order. Lay them out sequentially on a flat surface to verify the stack before applying any adhesive. Start assembling from the back of the frame forward, checking the alignment after every few layers.
Use tweezers to handle small, intricate details, especially if your design includes delicate branches or feathers. Press each layer firmly but gently to avoid crushing the foam spacers. If you notice dust or debris inside the layers, use a can of compressed air to clean between steps, as trapped particles become highly visible once the glass is sealed.
Remember that this is a digital product; no physical items will be shipped. Take time to review the included PDF instructions and test cuts on scrap paper to ensure your machine settings are optimized for your chosen material. This preparatory step saves time and reduces waste, ensuring that your final build goes smoothly.
Sharing and Ethical Use
As a creator, respecting intellectual property is vital to sustaining a healthy community of designers and makers. This digital download is intended for personal use and small commercial applications up to 100 end products. It is crucial not to resell or share the digital files themselves. By adhering to these guidelines, you support the artists who spend hours refining these intricate designs, ensuring they can continue to produce high-quality resources for the crafting community.
Whether you are building this for your own home, gifting it to a loved one, or selling it at a local craft fair, the Robin Bird Christmas 3D Shadow Box offers a rewarding creative journey. It invites you to slow down, focus on the details, and create a piece of art that captures the serene beauty of the holiday season. Through careful assembly and thoughtful customization, you transform flat sheets of paper into a window into a winter wonderland, proving that sometimes the most impactful decorations are those we build with our own hands.